
Covid-19 led to a globe-wide work-from-home experiment, and it is logical to expect the growing number of users accessing their computers remotely using Remote Desktop. Having an RDP port open to the Internet is generally considered insecure, and most of the security experts advise using VPN or/and two-factor authentication to improve the security. Here we will review an alternative approach using SSH tunneling.
What Is Remote Desktop?
The Remote Desktop Protocol (also known as RDP) is used to allow remote access to a computer. After logging in, you can control that computer remotely in almost the same way you control your computer. Though it is a powerful tool for businesses, it is also not very secure. Criminals know this, of course, and they have created a huge variety of tools to hack into this. Technically, RDP is as secure as your password. However, there is also an additional risk of zero-day vulnerabilities. An example, CVE-2019-9510, could allow attackers to hijack existing Remote Desktop Services sessions to gain access to a computer.
What Is OpenSSH?
OpenSSH is the open-source version of the Secure Shell (SSH) tools used by administrators of Linux and other non-Windows for cross-platform management of remote systems. OpenSSH has been added to Windows as of autumn 2018, and is included in Windows 10 and Windows Server 2019.
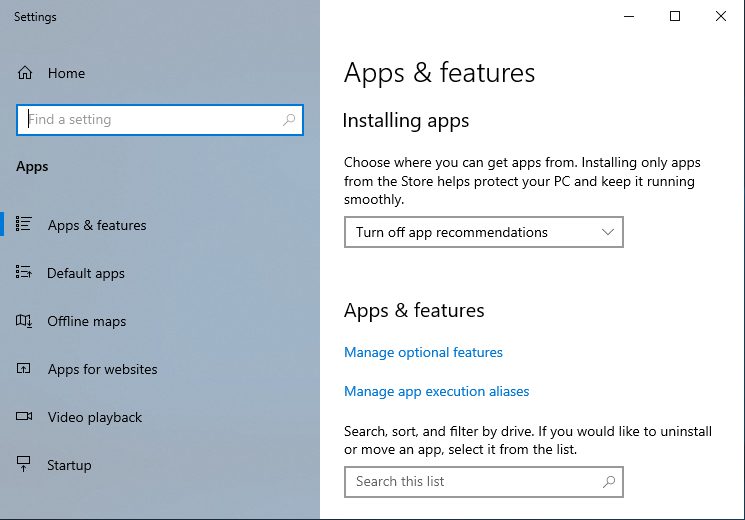
Setting up OpenSSH Server on Windows 10
We will be using Windows 10 LTSC 2019 and user belonging Administrators group. For the higher security, you may consider using a more restricted user for the SSH connection.

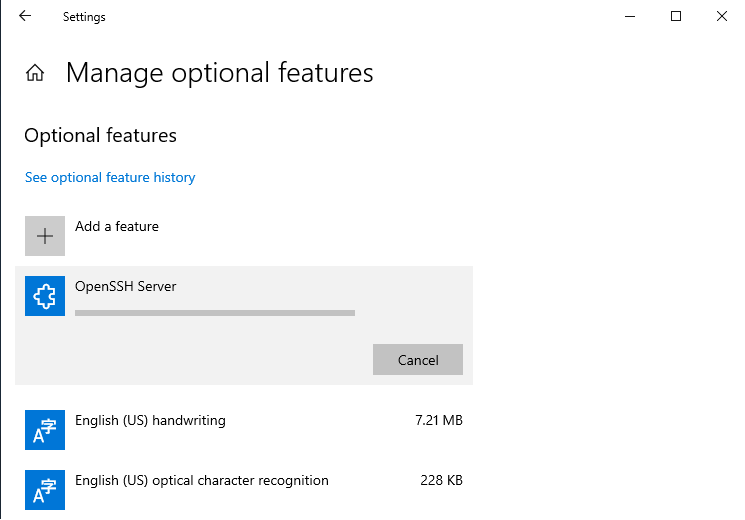
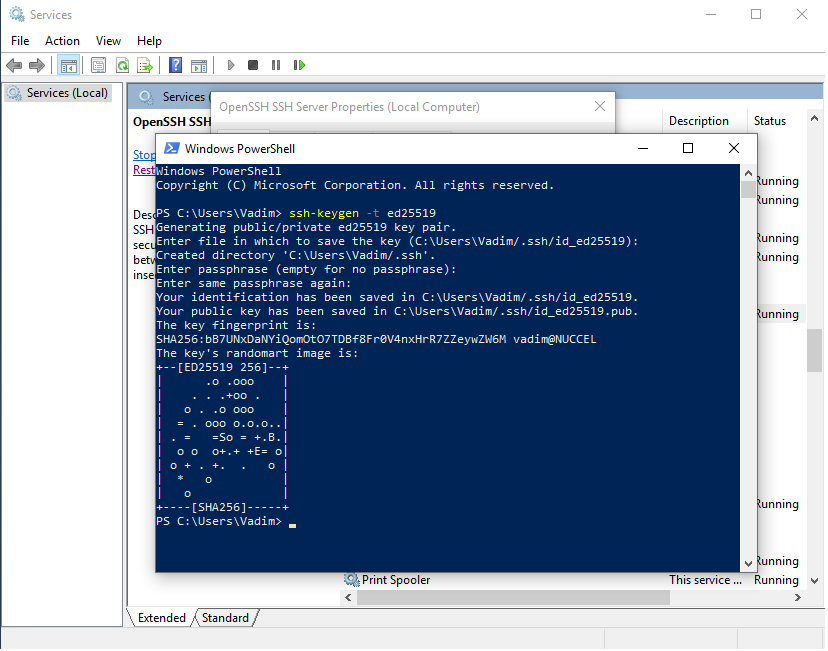
By this moment, you have installed OpenSSH server. Now it is time to generate the new key you will be using to authenticate within OpenSSH server. The most recommended public-key algorithm available today is Ed25519. So, open PowerShell and execute: ssh-keygen -t ed25519
For the following steps, please note that to edit %programdata%\ssh\sshd_config, and %programdata%\ssh\administrators_authorized_keys the text editor (Notepad?) must be started as Administrator.
- Open
%programdata%\ssh\sshd_config(normally the path isC:\ProgramData\sshand worth to note that ProgramData is a hidden folder, so you can change View settings to see hidden folders or navigate into it directly typing the address) - Locate the string ‘
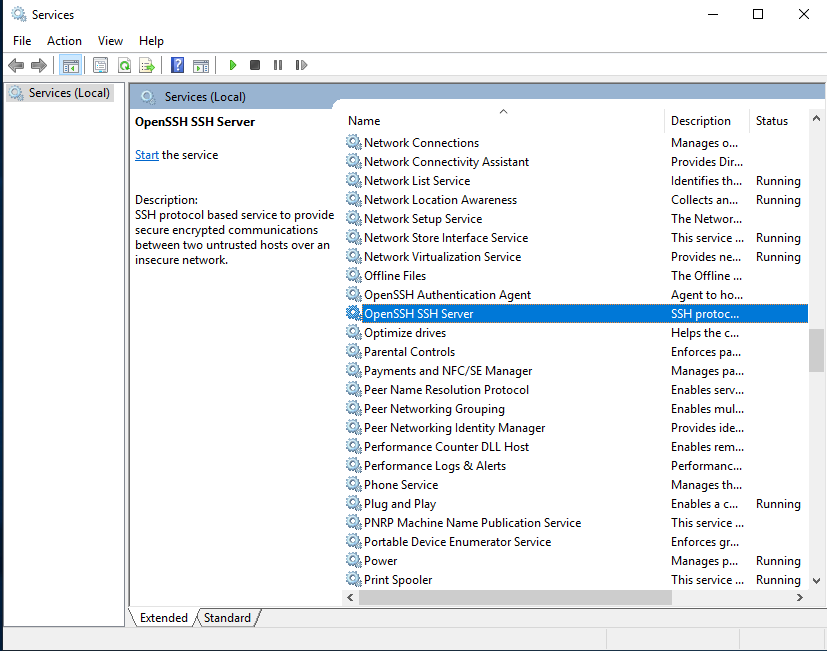
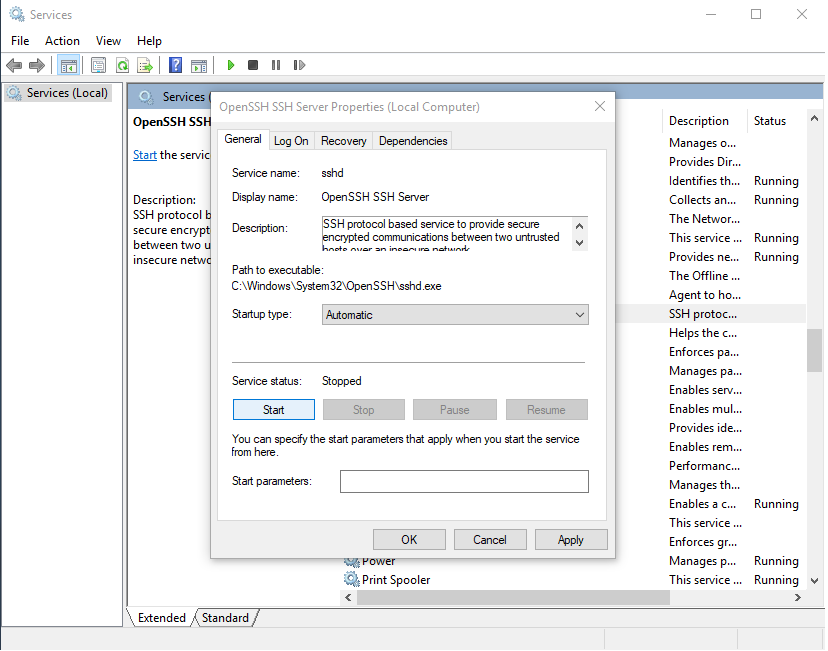
#PasswordAuthentication yes‘ uncomment (remove ‘#’) and change it to ‘PasswordAuthentication no‘ to disable password authentication. Save the file and restart OpenSSH SSH Server service. - Copy your public key
id_ed25519.pubgenerated by ssh-keygen into the%programdata%\ssh\administrators_authorized_keys. If this file does not already exist then to do this you can start PowerShell as Administrator, change to your home directory and executecopy ./.ssh/id_ed25519.pub C:\ProgramData\ssh\administrators_authorized_keys. Otherwise, you can simply append your newly generated public key into it. - If you have created
%programdata%\ssh\administrators_authorized_keyseither by copyingid_ed25519.pubor directly, then you may need to fix permissions on it. Once again you need PowerShell started as Administrator, change directory to the%programdata%\sshand execute the following:icacls administrators_authorized_keys /inheritance:ricacls administrators_authorized_keys /grant SYSTEM:(F)icacls administrators_authorized_keys /grant BUILTIN\Administrators:(F)
Configuring OpenSSH client
For the next steps, you need to copy private key file id_ed25519 to the client computer and setup port mapping within the router to make OpenSSH server port open to the Internet. And don’t forget to remove your RDP port mapping!
Let’s assume that SSH server port (192.168.1.55:22) is mapped externally as rdp.sshvpn.me:222
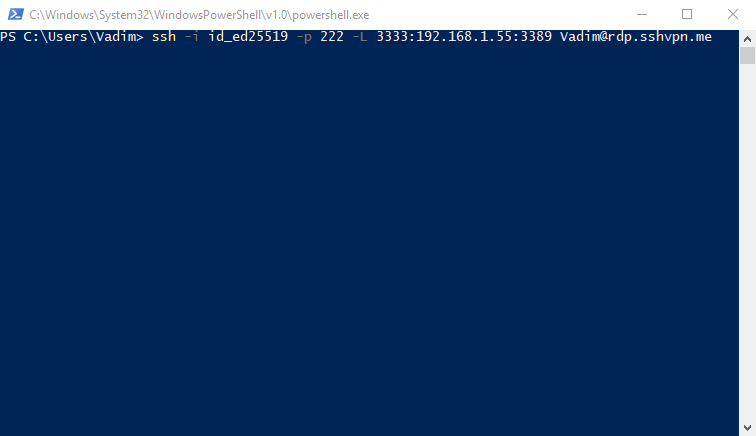
ssh -i id_ed25519 -p 222 -L 3333:192.168.1.55:3389 [email protected] -i id_ed25519specifies the private key-p 222sets the target port 222-L 3333:192.168.1.55:3389maps localhost port 3333 to the 192.168.1.55:3389 (192.168.1.55 is the address of our Windows host in LAN and 3389 is a standard RDP port)
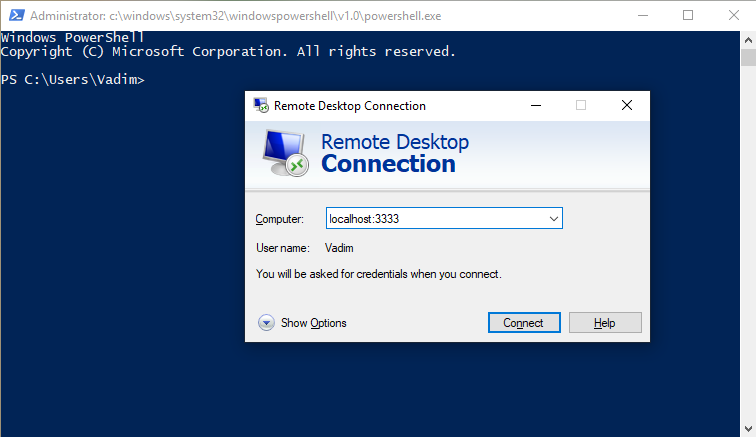
To automate things, you can create a two-lines PowerShell script:start mstsc /v:localhost:3333
Start-Process -NoNewWindow -FilePath ssh -ArgumentList '-f -N -L 3333:192.168.1.55:3389 -i id_ed25519 -p 222 [email protected]'
As you may have already noticed, we added two command lines switches ‘-f -N‘ which allow starting an ssh session as a background process.
OpenSSH and WSL
Its worth mentioning that alternatively, you could install Windows Subsystem for Linux (WSL) and configure OpenSSH server shipped with the Linux distribution to achieve the same functionality. The disadvantage of this method is that it takes more space on disk and CPU resources to run WSL. Besides this, to start WSL OpenSSH server automatically requires configuring Task Scheduler. However, if you find Linux more secure, then this is also an acceptable option.
Ouch! What a disadvantage
So far so good, RDP is double protected by secure SSH key and Windows password. But there is a price to pay. To improve the performance over high latency networks, RDP 8.0/8.1 and later can use UDP in addition to TCP as transport. However, SSH can only tunnel TCP connections, so you miss this option.